


Mr Creepy was a big hit the first time I posted him on Facebook…and in all actuality, he is really something created on a whim ~ just to play, not for an intended purpose!
So why not share right?
With many tools in my belt ~ such as Decorative Art knowledge, a few sculpting skills, my love for vintage, my favorite go-to products and an imagination with no end…he was a lot of fun to create without a purpose or a plan.
This is the real Halloween deal, no big box store décor for this girl……. made by my hands in my own Studio. Makin’ Pretties. Well I don’t know if I would call it makin’ pretties, lol……..his gaze gave me the behibber, jeebers….so I named him Mr Creepy!

So he came together like this…..

Using a Styrofoam ball from my stash and a kitchen knife, gosh, where are those sculpting tools ?!??! I carved the hollowed eyes and mouth, then added a few deep slits all around lengthwise, then cut off a slice from the bottom so he would sit steady….and carved a hole in the top just big enough to place a candle (I used what I had on hand which was a battery candle, if I would have thought it thru I would have left the candle use-able by not adding the wood clay to secure him….oh, well)
….what kind of face would you create?
Slice small pieces of Quickwood (see sculpting how-to video here) to create the eyeballs to float in the hollowed holes, a triangle nose and square-like teeth. Secure the candle in place inside the top hole. Working quickly before the Quickwood sets.

After the wood clay is set, cover the entire surface with Texture Terra Cotta by DecoArt. This will add even more texture to enhance the look of a vintage-like pumpkin.
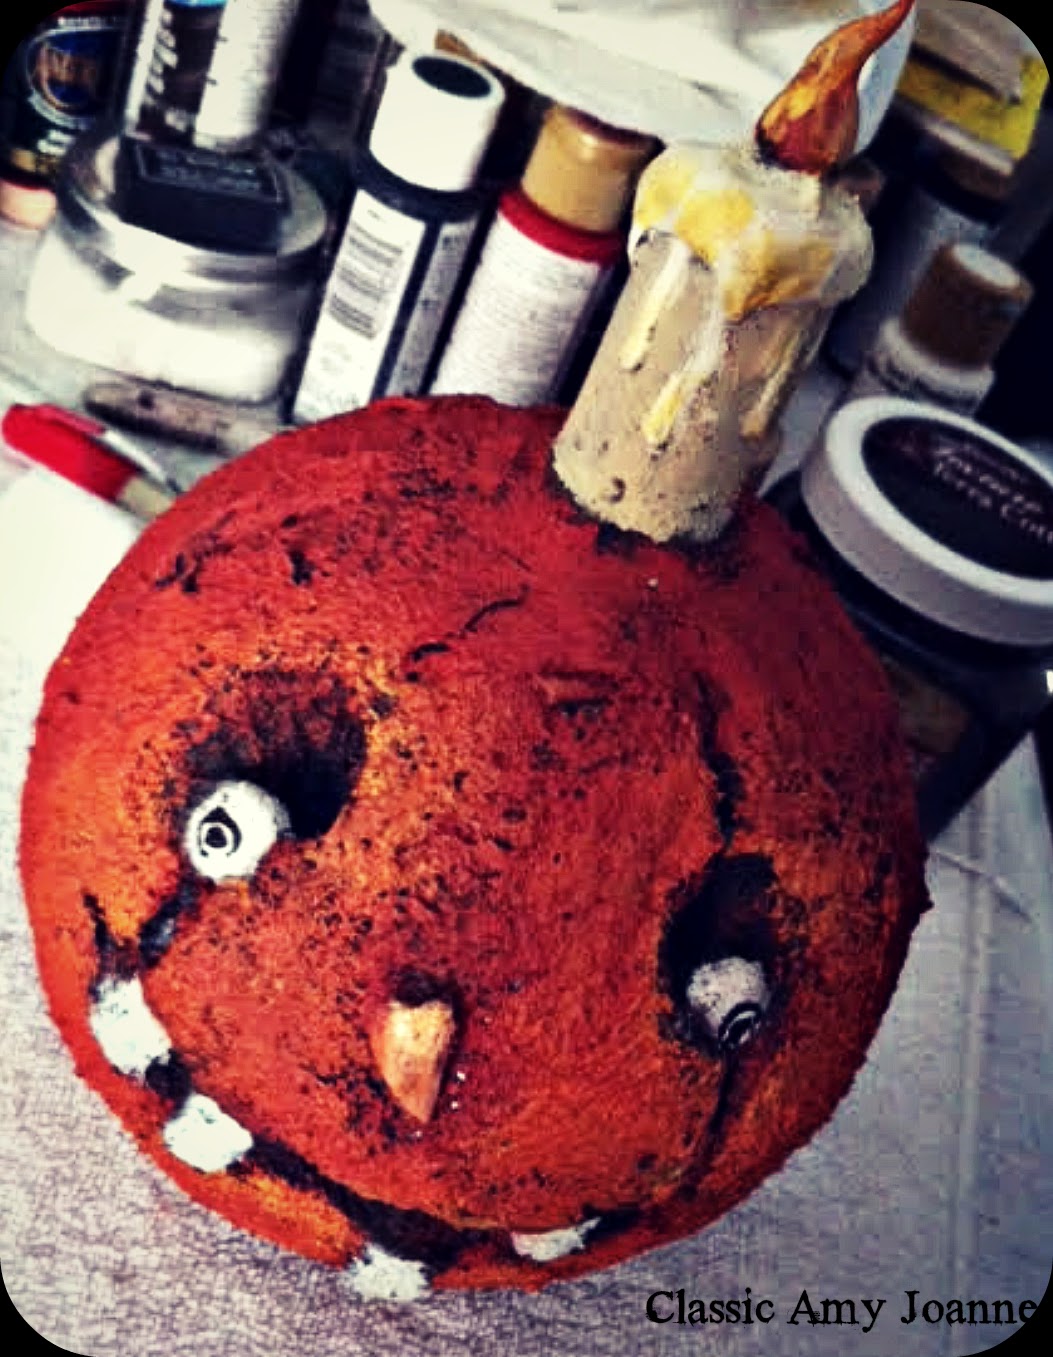
Paint him (and his candle), with DecoArt Paints ~ Georgia Clay, Orange Flame, Yellow Ochre, Light Buttermilk, etc.
Finishing with DecoArt Walnut Antiquing Gel by gently dabbing off with a baby wipe, then spray with a Sealer…. then spray Glitter for sparkle!
Then…..
Embellish ~ crumple up a manila tag and spray it ~ along with medical gauge from the bathroom closet with Tim Holtz Walnut Stain Distress Spray. Then rubber stamp the tag with a spooky design, then tie the gauge ~ and pin the tag to candle…..my pin is a vintage find….
Really….all you need is a Styrofoam ball and Quickwood and the rest can be created with whatever you have on hand…..from the texture to the paint to the embellishments!


Just tell me ~ he is not the creepiest cutie pie!
~*~
And for the Classic Chalk Art Artists ~ give Mr Creepy a try on a chalkboard ~ he is looking pretty creepy too.

Have you tried Classic Chalk Art? If not click (here) to watch a quick how-to video with a free pattern….I am sure you will be hooked!
….and then try Mr. Creepy! Click below for a free pattern and enjoy!


Did you enjoyed your visit today?….have you entered your email address to the blog page to follow along and receive instant updates? I’m sure glad you stopped by…..
Happy Halloween!

~*~
Have you visited all the fun blog posts this Autumn Season? Click on the ‘Blog’ tab in the menu and scroll thru and visit…..Hope to Inspire


~*~
Up Next ~ Eucalyptus, The Pilgrims, Handmade, Homemade, Homespun and Heartfelt, Wish Upon A Star, It’s all in the Presentation, Plaid Bowl Covers
I’ve sculpted using Air-dry clay, but never quik wood. I shall have to try it! Thanks for posing this, it’s so creepy cute!
Thank u! This was one of my favorites!
love the Creep, spoke to me on such a great, creative level, your imagination Rocks!
Thank you….just another form of Art, love it!
LOL!! Mr creepy is definitely scary…in a cute way. I love him:> Thank you for sharing your awesome technique Amy..
Thank you Effie….always fun to be creative!
Truly amazing how you created Mr. Creepy. I see products like the Texture Terra Cotta and have no idea what to do with it so I pass it by in the store. I think that’s one of the reasons why I like this blog so much. You show us readers a collection of wonderful ideas and those “off the wall” products, how to put it all together, and along comes a truly one of a kind piece. Thank you for the pattern Amy and for showing how Mr. Creepy was formed. Truly artistic.
Ahhh, Thank you ! I just love to try things….you should see the things that don’t turn out, lol ! Always fun!
Very cool Amy …makes me smile
Thank you Elaine! Smile…..
He is pretty cute !!
cutie patoodie….and creepy!
Very cool…lol…hmmm…not sure I have a BIG Styrofoam ball….wonder what I do have?! Lol
mmmm, what will you come up with ?
I love Mr Creepy .. so cute and creepy at the same time .. Thanks for the free pattern
you are welcome!
I love him!
Thank You! He is a cutie pie!
scary cute :}
🙂